# Use Teacher Commands During Class Sessions
Teacher commands can be used to interact with your students during active classroom sessions.
# Lock / Unlock Screen
The lock screen command will **mute** and **disable all Chrome windows** on your student's device. The command is designed to unlock at the end of the session, but if a student joins a new session before the first session ends, they will remain locked.
##### **To lock a student's screen:**
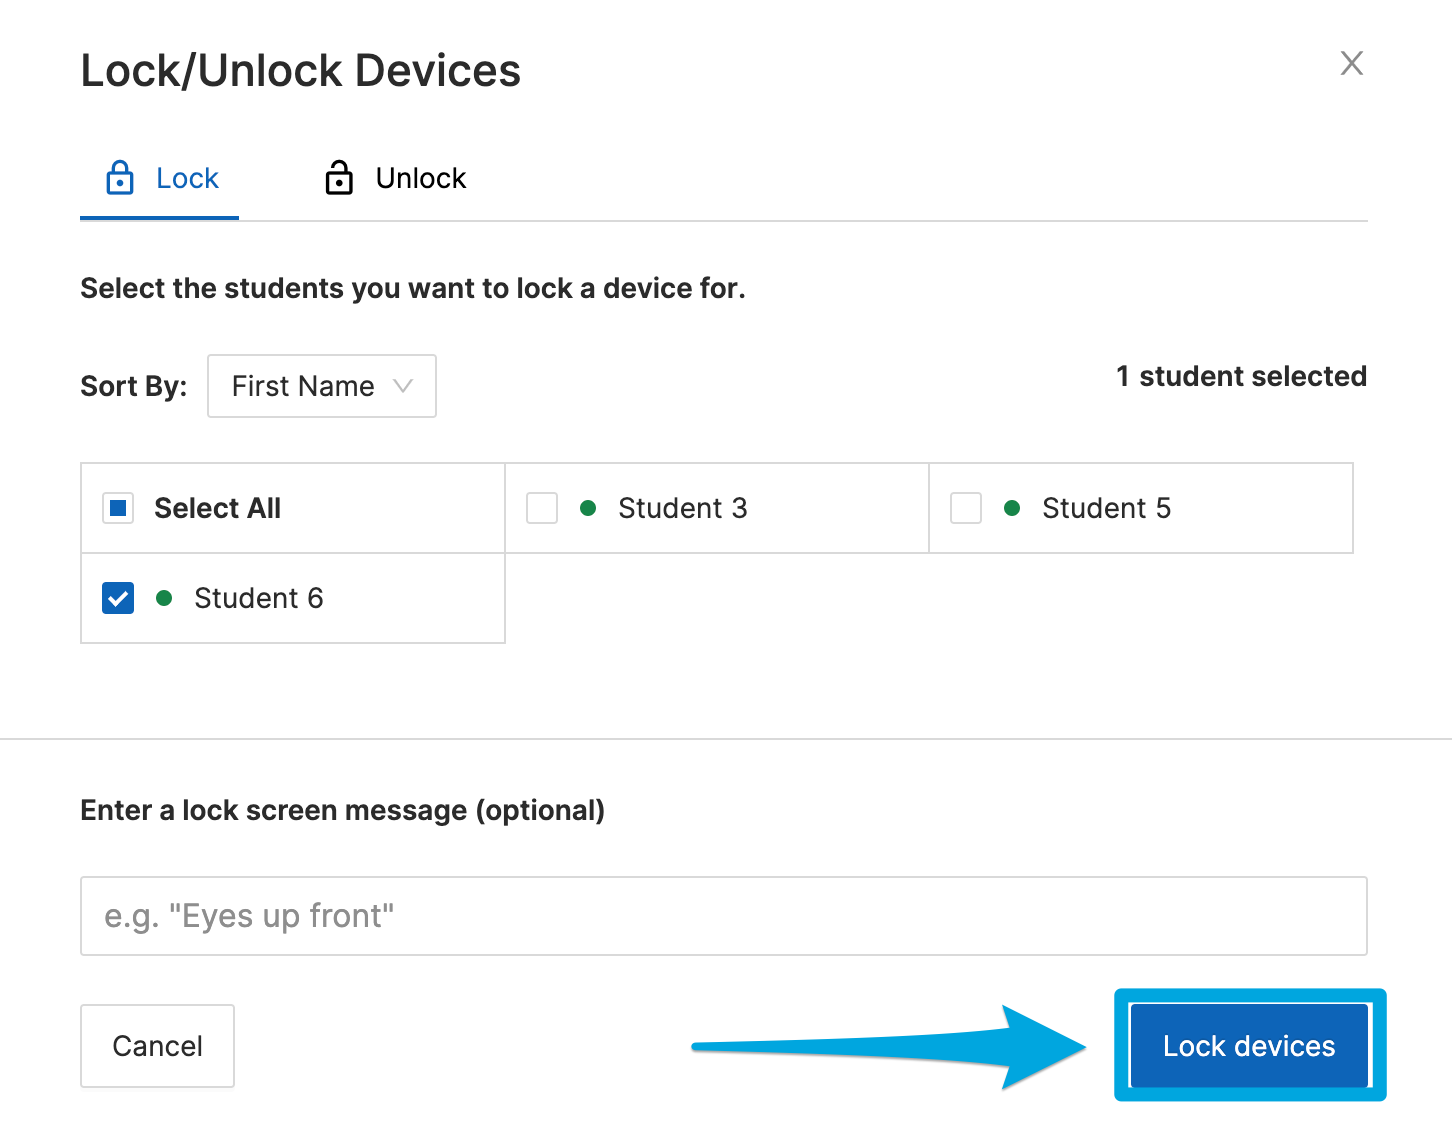
1. Select one or more students using the checkbox to the left of each student's name
2. Click the **Lock / Unlock device** button
3. (Optional) enter a custom message to be displayed on the locked screen
4. Click **Lock** devices on the **Lock / Unlock** Devices confirmation popup window
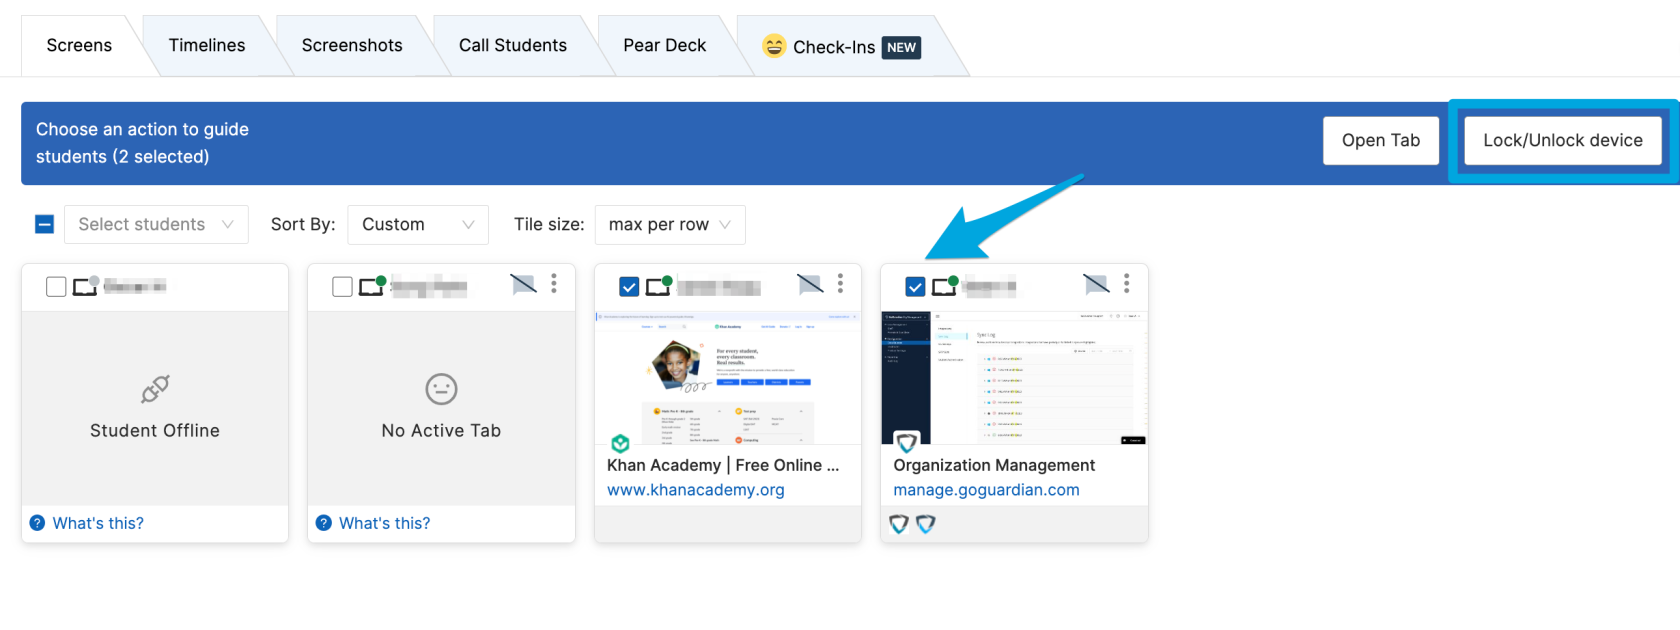
Devices may also be locked or unlocked by clicking the Lock / Unlock device button on the command bar and then making lock / unlock selections.
##### **To unlock a student's screen:**
1. Select one or more students using the checkbox to the left of each student's name
2. Click the **Lock / Unlock** device button
3. On the **Lock / Unlock** devices popup window, click the **Unlock** button
4. Confirm by clicking the **Unlock** devices button
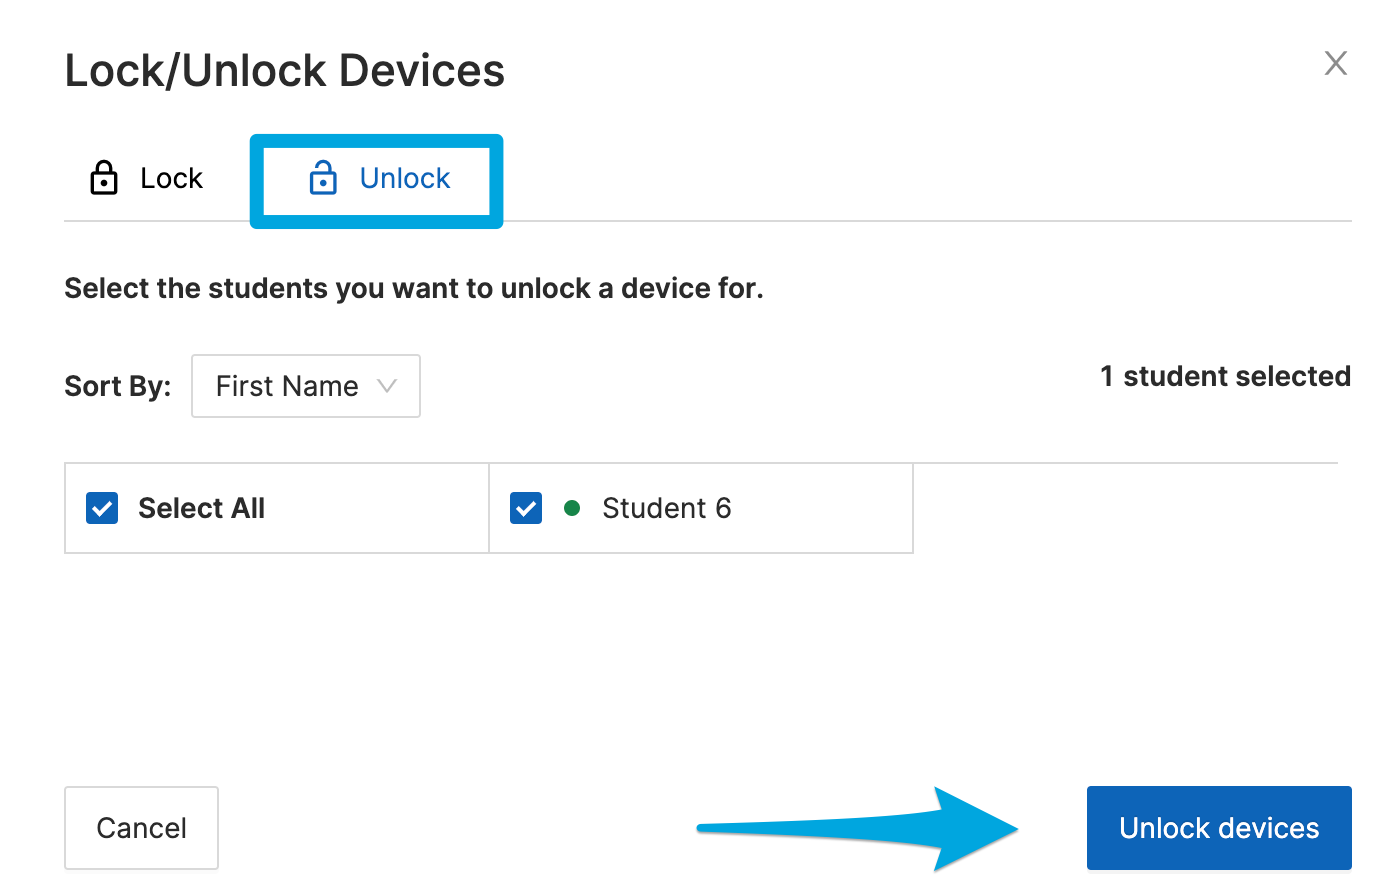
If the student's device does not unlock after 30 seconds, reboot the student's device, wait for the student to connect to the session, and then issue the unlock command again.
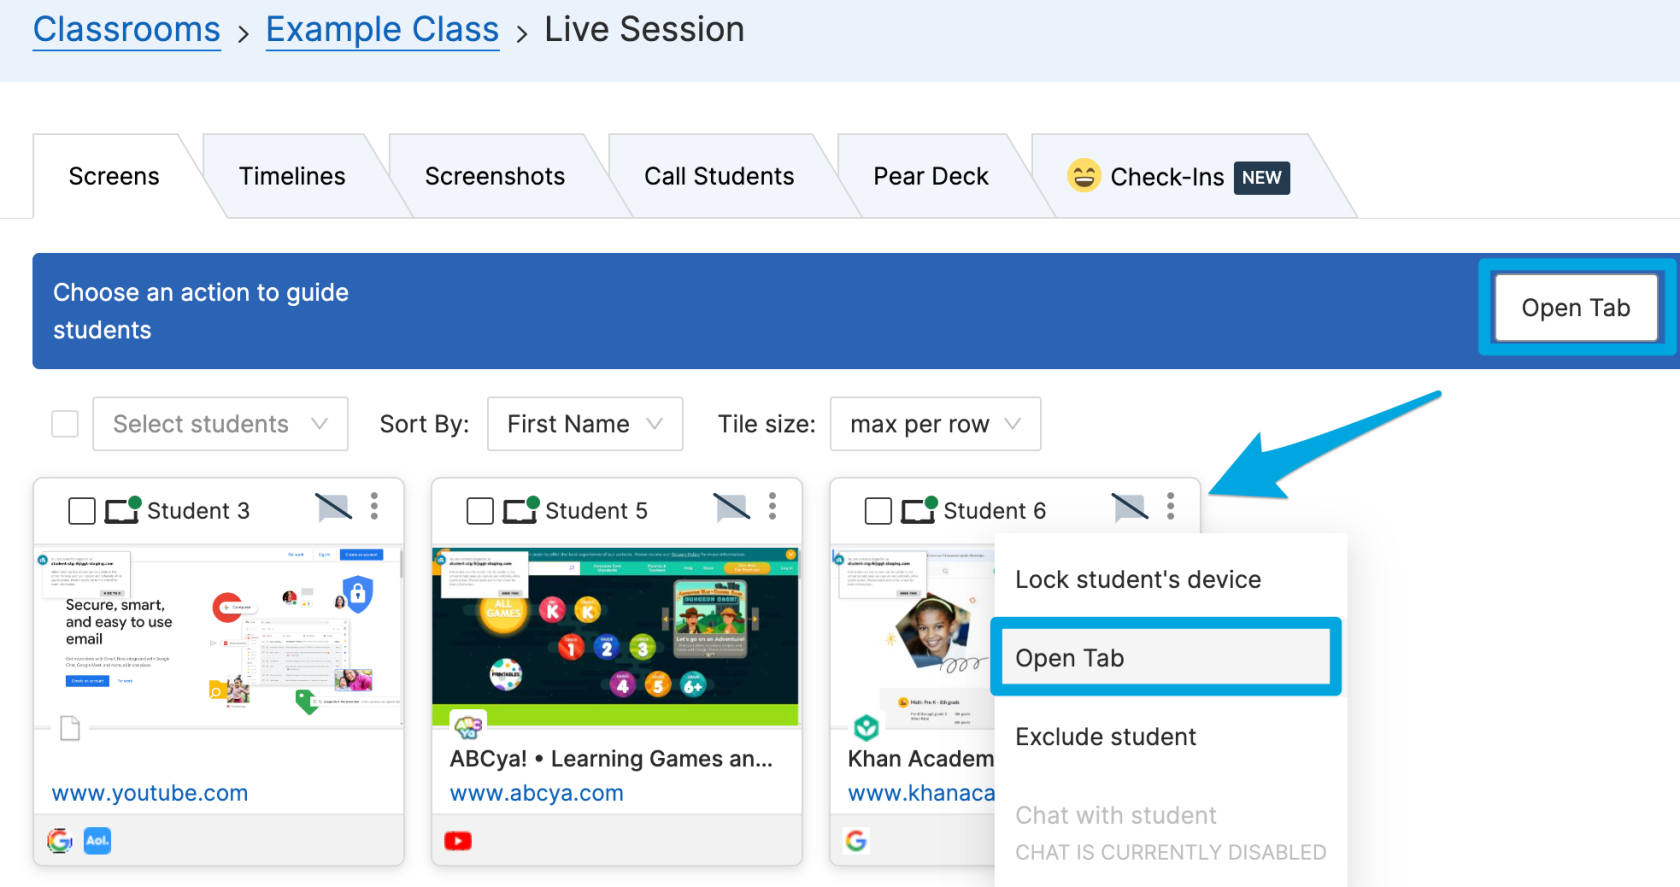
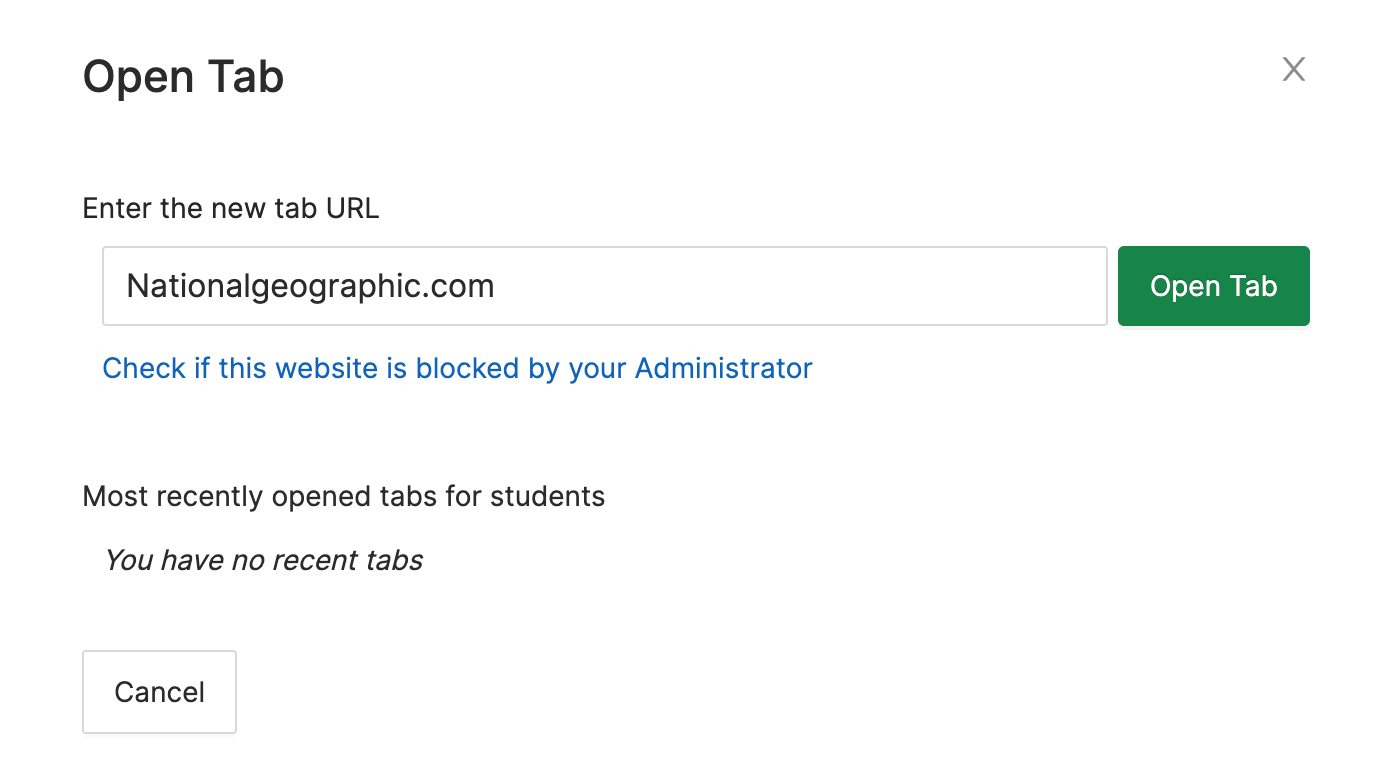
# Open / Close Tab
The Open Tab command allows teachers to direct students to any web page by entering a URL to be opened on the selected student's screens.
##### **Opening a Tab for Multiple Students**
1. Click the **Open Tab** button
2. Check the boxes next to **Select All** or choose specific students and click **Next**
3. Enter a URL in the Open Tab interface and click **Open Tab**
Opening a Tab for One Student
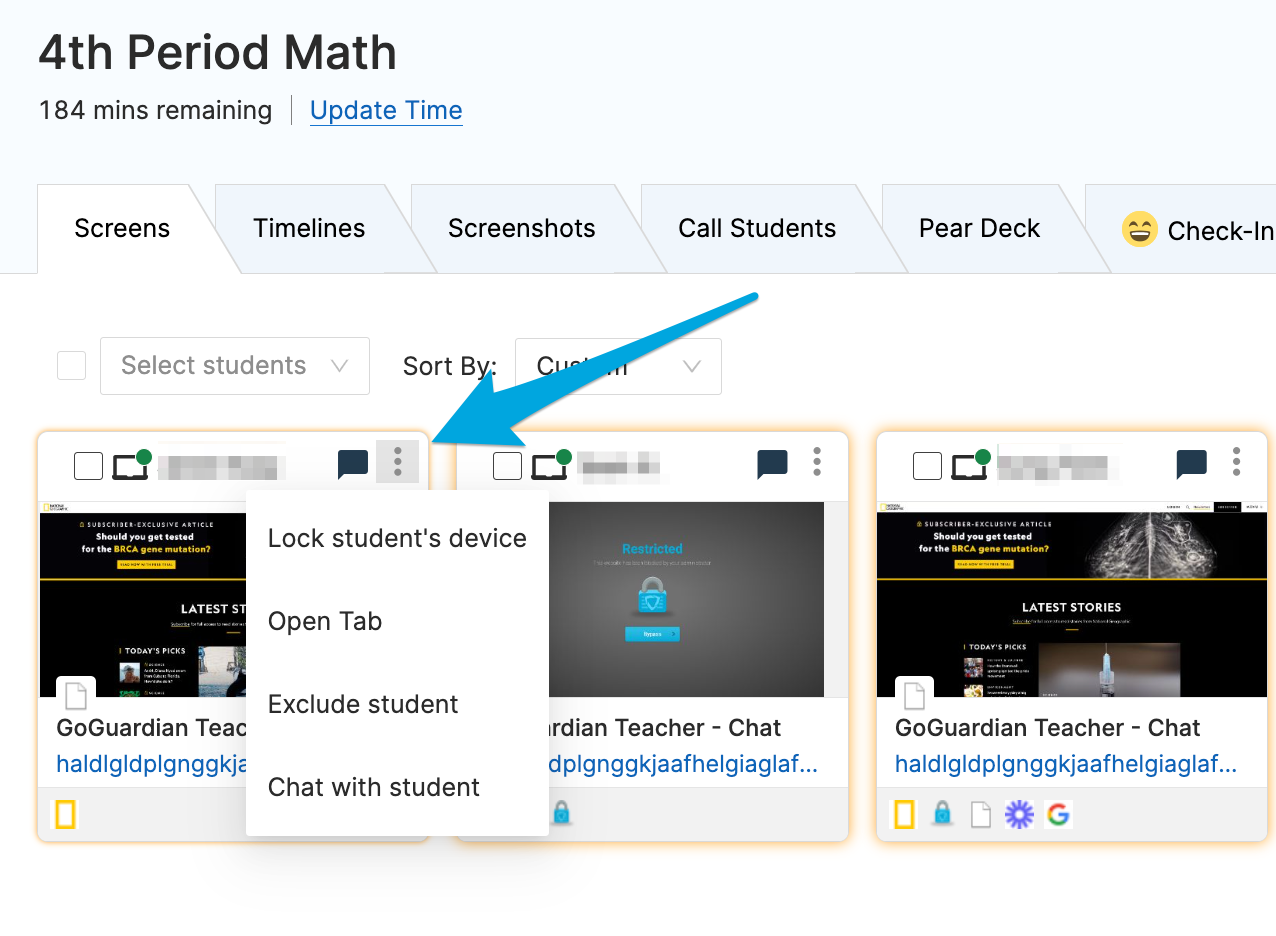
1. Click the 3 dots button in the corner of a student's tile
2. Select the **Open Tab** button
3. Enter a URL in the Open Tab interface and click **Open Tab**
##### **To close a tab:**
1. Click on a student's tile (their screen view)
2. Identify the tab you would like to close on the list
3. Click **Close** to the right of the URL
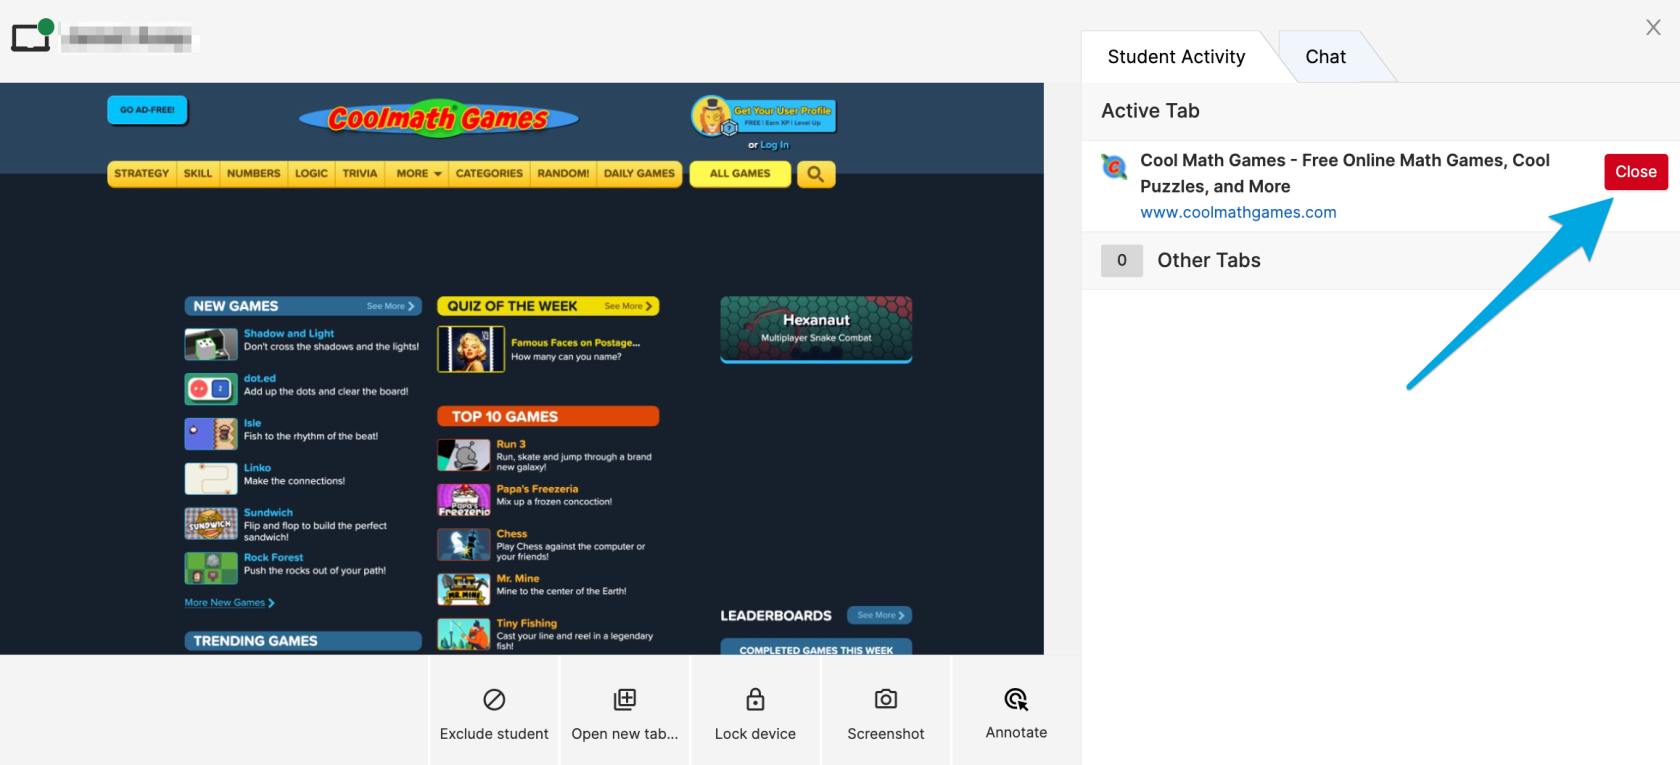
Note: It can take up to 10 seconds for the closed tab to disappear from your Teacher dashboard.
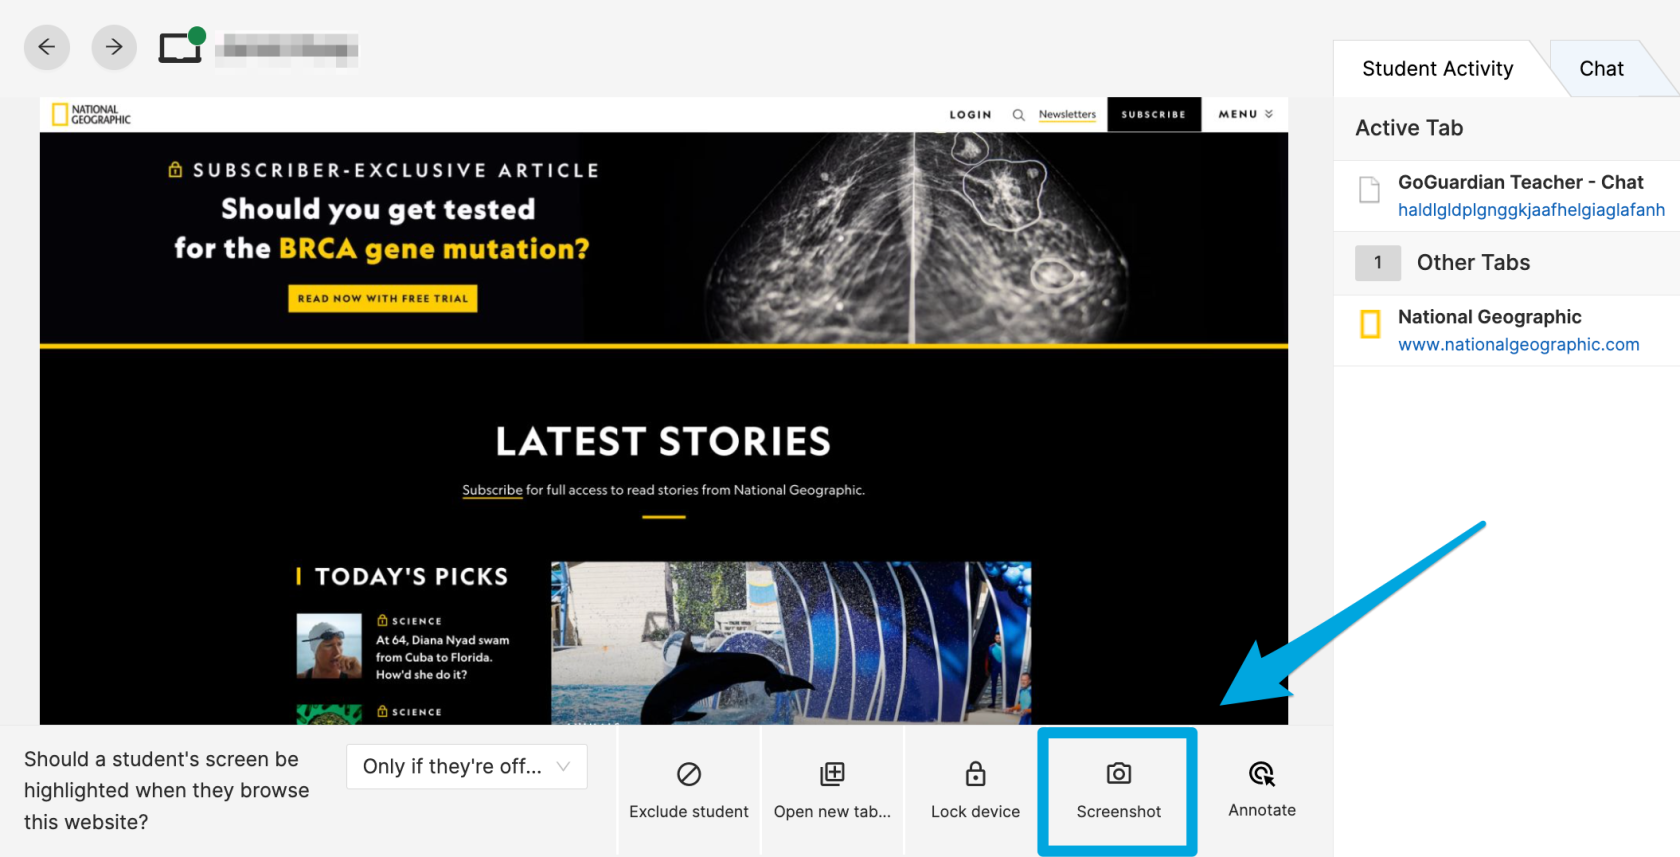
# Take a Screenshot
Using **Screenshot**, you can quickly document student screen activity to reference later. Screenshots are saved along with other past session data on the classroom's Sessions tab.
##### **To take a screenshot:**
1. Click the screen of the student
2. Click the camera icon on the bottom right corner
##### **To view screenshots from the current session:**
1. Click the Screenshot tab under the class name
2. Click Download Screenshot or save to Drive
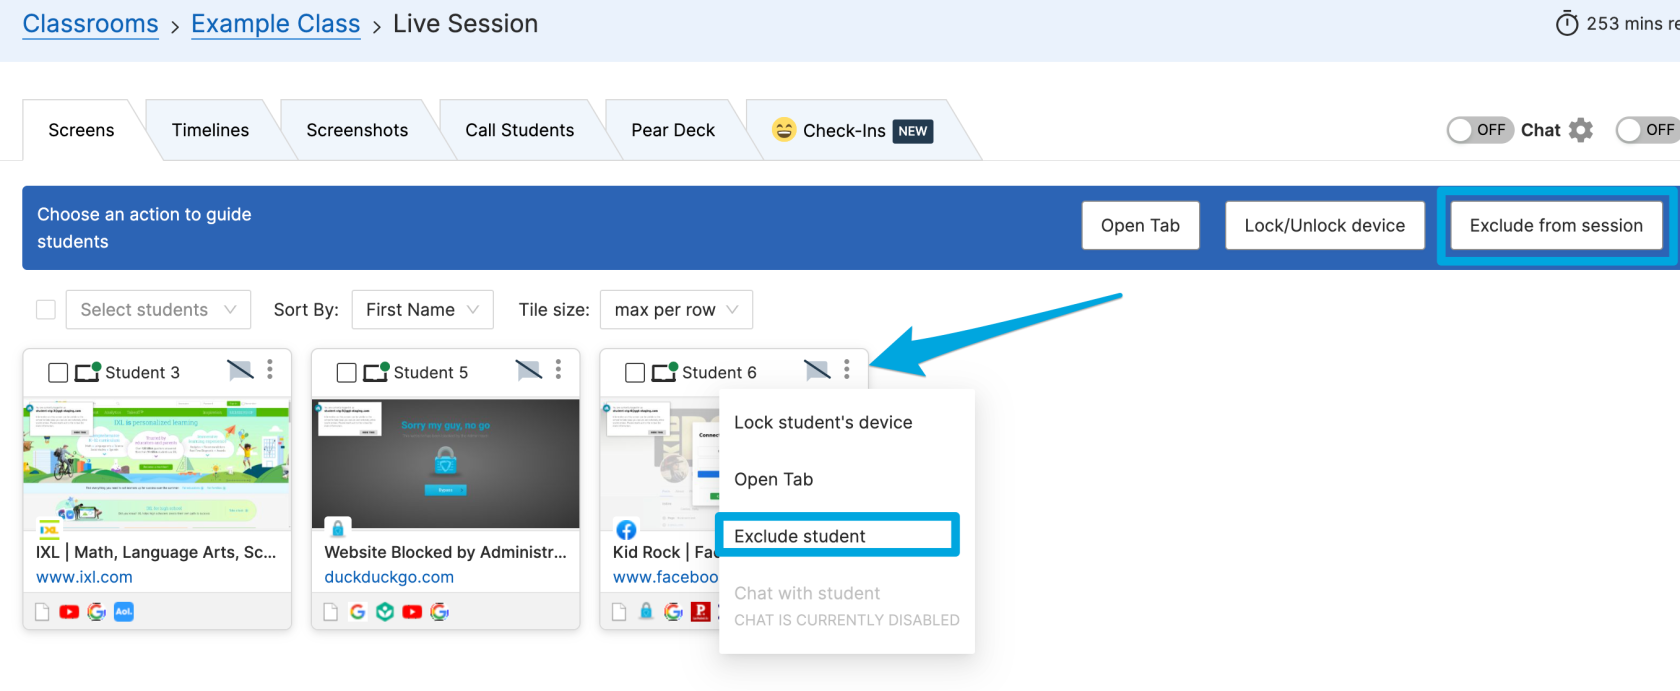
# Exclude and Include Students
Students who are absent can be excluded from your classroom session with the **Exclude** command. This command will temporarily hide the student from your Screens and Timeline views. Students can be excluded and re-included at any time during your session. Excluding a student will not delete them from your roster.
##### **To Exclude One Student:**
1. Click the 3 dots button in the corner of a student's tile
2. Click the **Exclude student** button
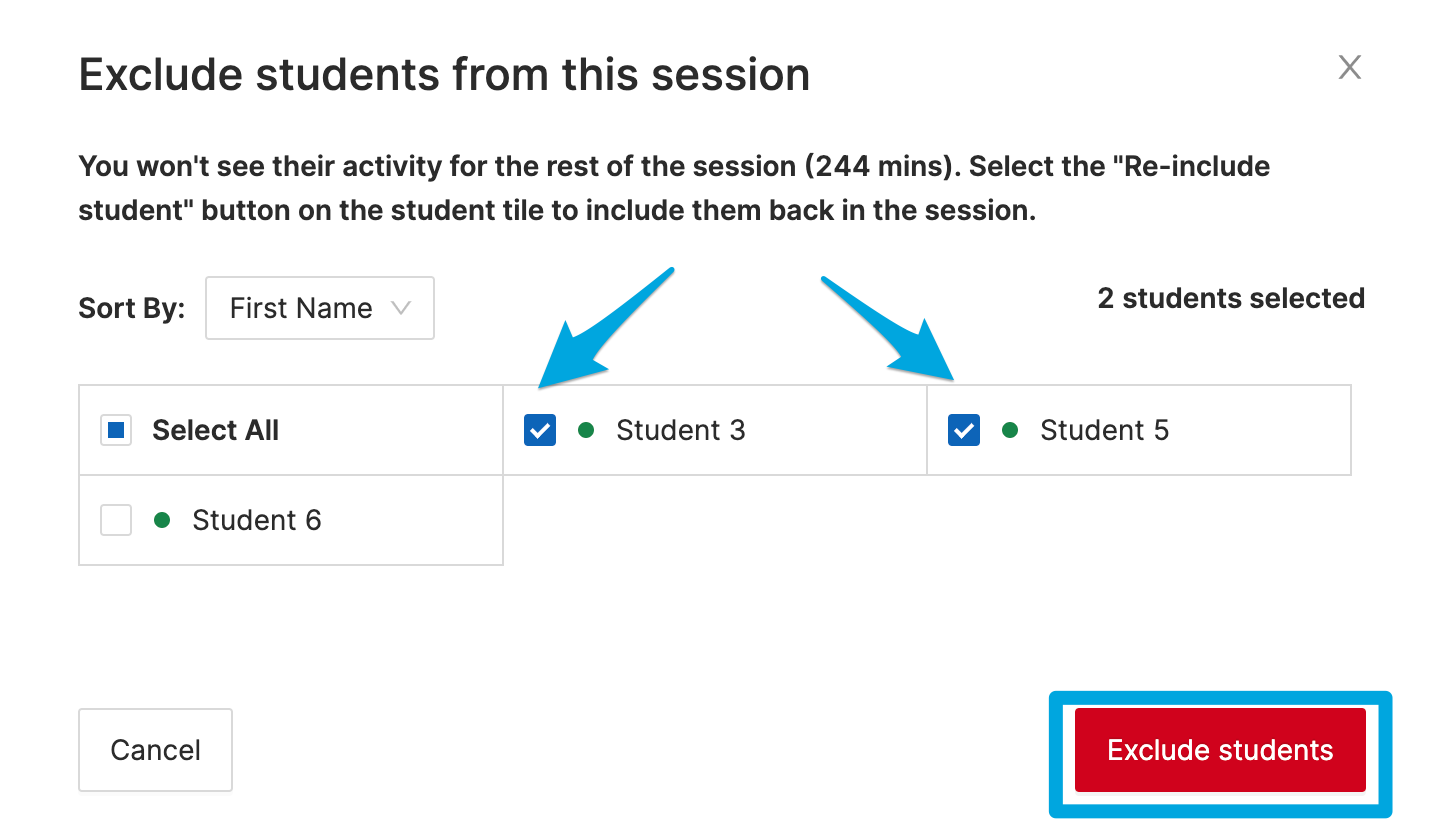
##### **To Exclude Multiple Students**
1. Click the **Exclude from session** button
2. Select All or check the boxes next to specific students
3. Confirm by clicking the **Exclude students** button
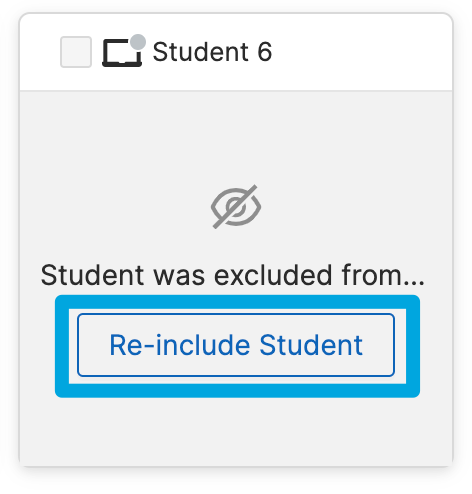
##### **To Include a Student:**
1. Find the excluded student's tile
2. Click the **Re-include Student** button
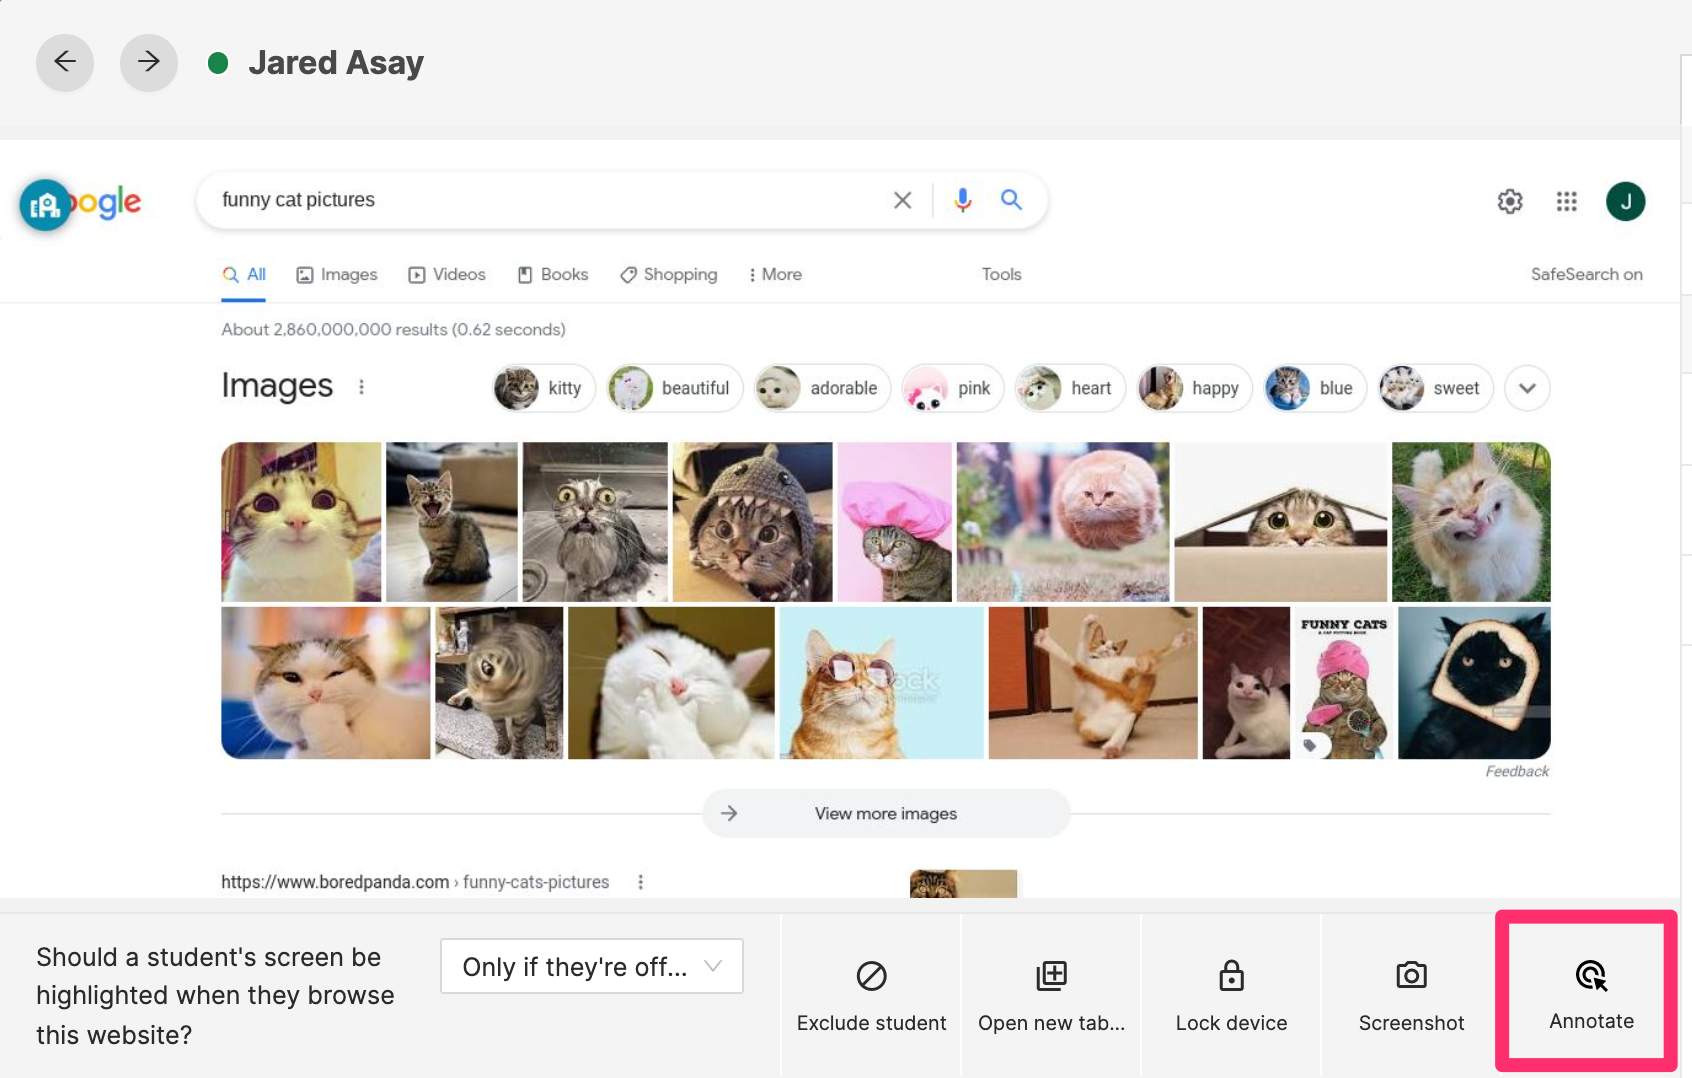
# Annotate
With the **Annotate Student Screen** feature, teachers can place a colored circle on the webpage that the student is currently browsing to help guide them. On the student’s side, the circle will appear for ~10 seconds and then disappear. Teachers may also change the color and size of the pointer by using the Pointer Color and Pointer Size options.
This option is available on the bottom right of a student's screen view:
# Issue Individual Commands from a Student's Tile
Teachers can also issue the following commands to individual students by clicking on the three vertical dot menu in the top right corner of a student's tile:
- Lock / Unlock Screen
- Open Tab
- Exclude Student
- Start a Chat (if chat is enabled for the active session)