Configure a Classroom Schedule
By configuring a classroom schedule, you can automate when classroom sessions start and stop. Classroom schedules can be configured to run multiple times a day and at different times throughout the week.
Setting up a scheduled session
To set up automatic class sessions for a specific class:
- Select a classroom
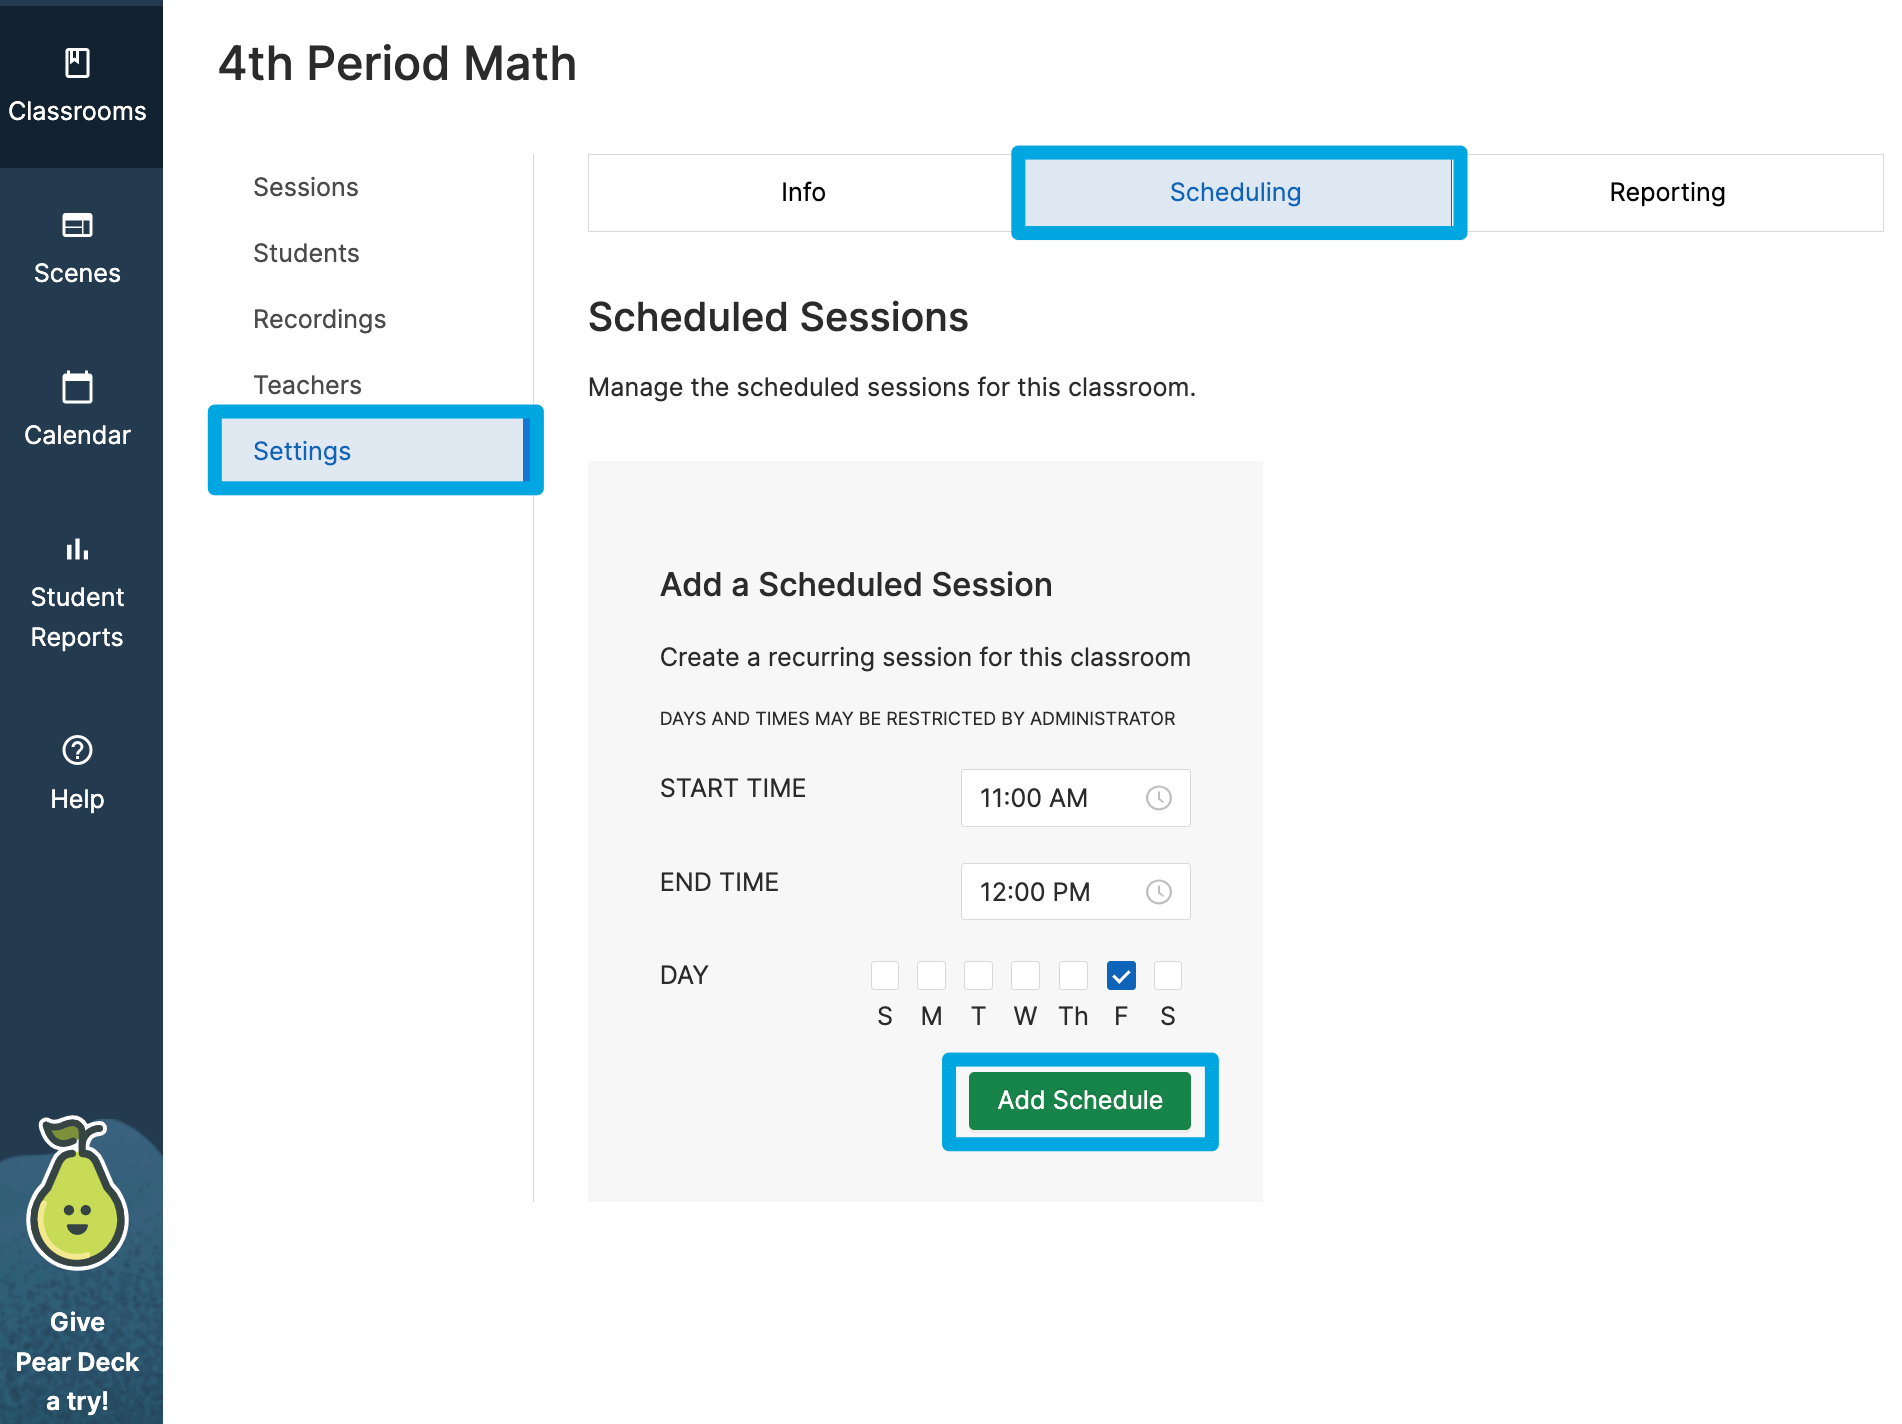
- Click the Settings tab
- Click the Scheduling tab
- Click the Add Schedule button
- Select a start time
- Select an end time
- Select the day(s) of the week
- Click the Add Schedule button
Using the Calendar
Automatic class sessions can also be managed by using the Calendar tab. The Calendar tab will display all actively scheduled classes as well as grant the option to Edit the schedule, cancel scheduled classes, or add a new scheduled class by clicking the "Add to Calendar" button.
